Navigating UX Figma Files: A Practical Guide
Accessing and navigating UX design files with confidence
Description
A practical help sheet to ensure designs are easily found and understood in Figma, preventing missed files and knowledge gaps.
It also walks through what to expect in Figma files, including accessibility specs and design specifications, for smoother collaboration.
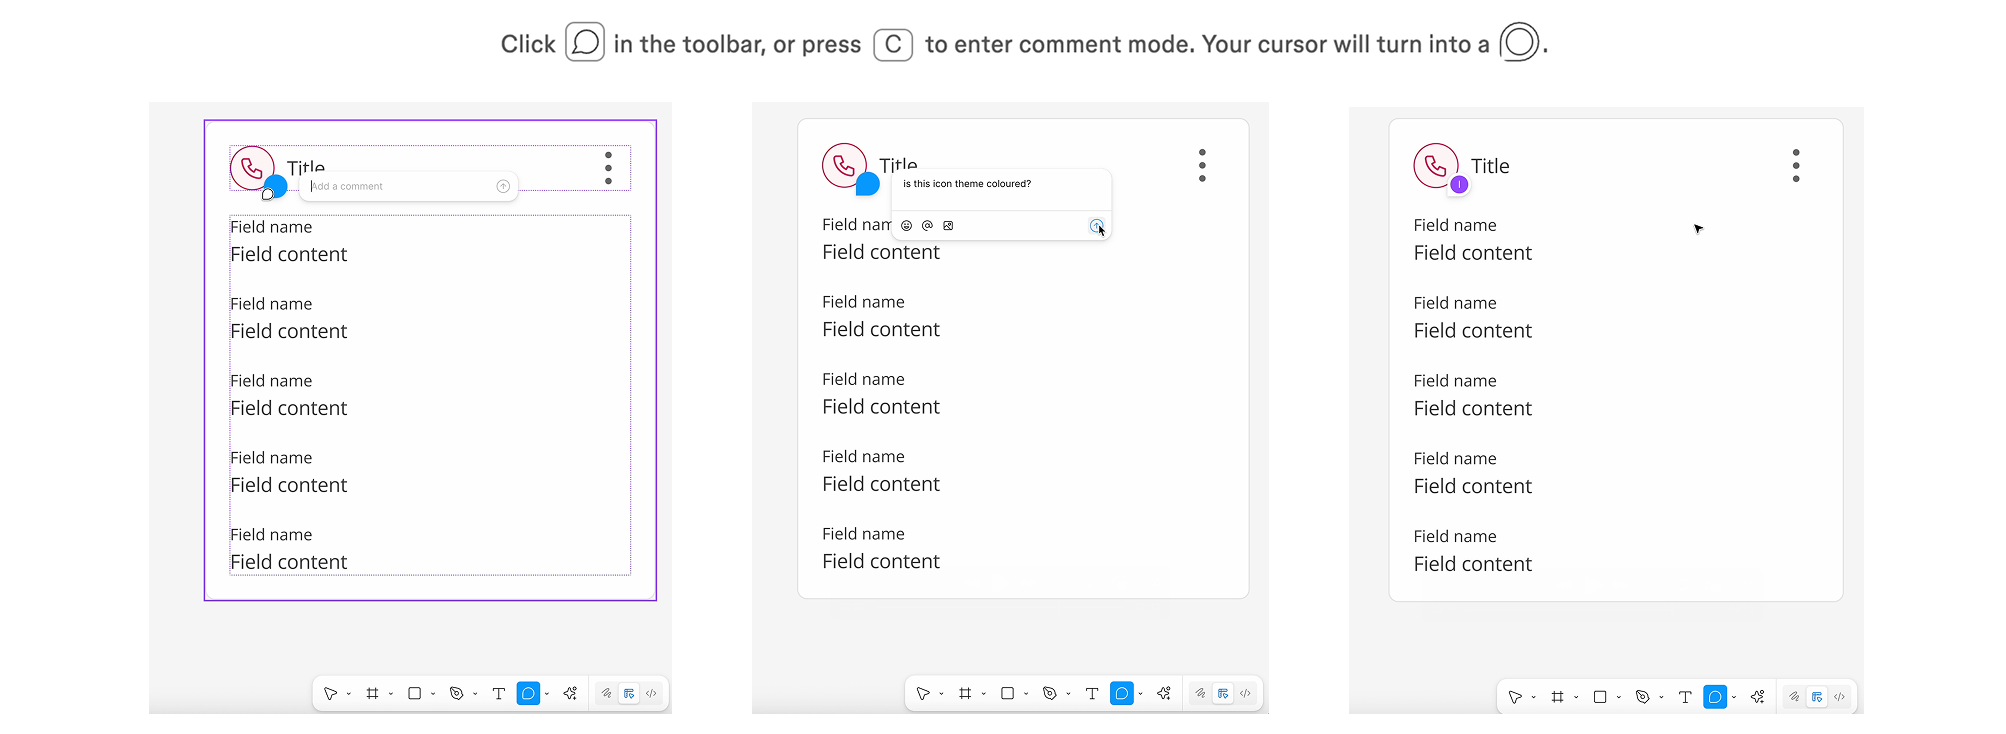
Commenting and asking questions directly in figma
Use the comment tool (the speech bubble icon) to leave feedback directly on a frame or design element.
Reference what you’re commenting on (e.g. “Should this button say ‘Submit; instead of ‘Next’?”).
Use @mentions to tag the right person if you need a response or clarification.
Example
What to ask vs when to explore
Explore first - If it’s about understanding structure, naming, or flow - many questions can be answered by zooming out or checking page titles.
Ask - When something isn’t clear, feels inconsistent, or simply is lost within the file, it’s always best to ask the designer.
If in doubt - A quick question is always better than making assumptions or missing something important. Designers prefer questions to missed details.
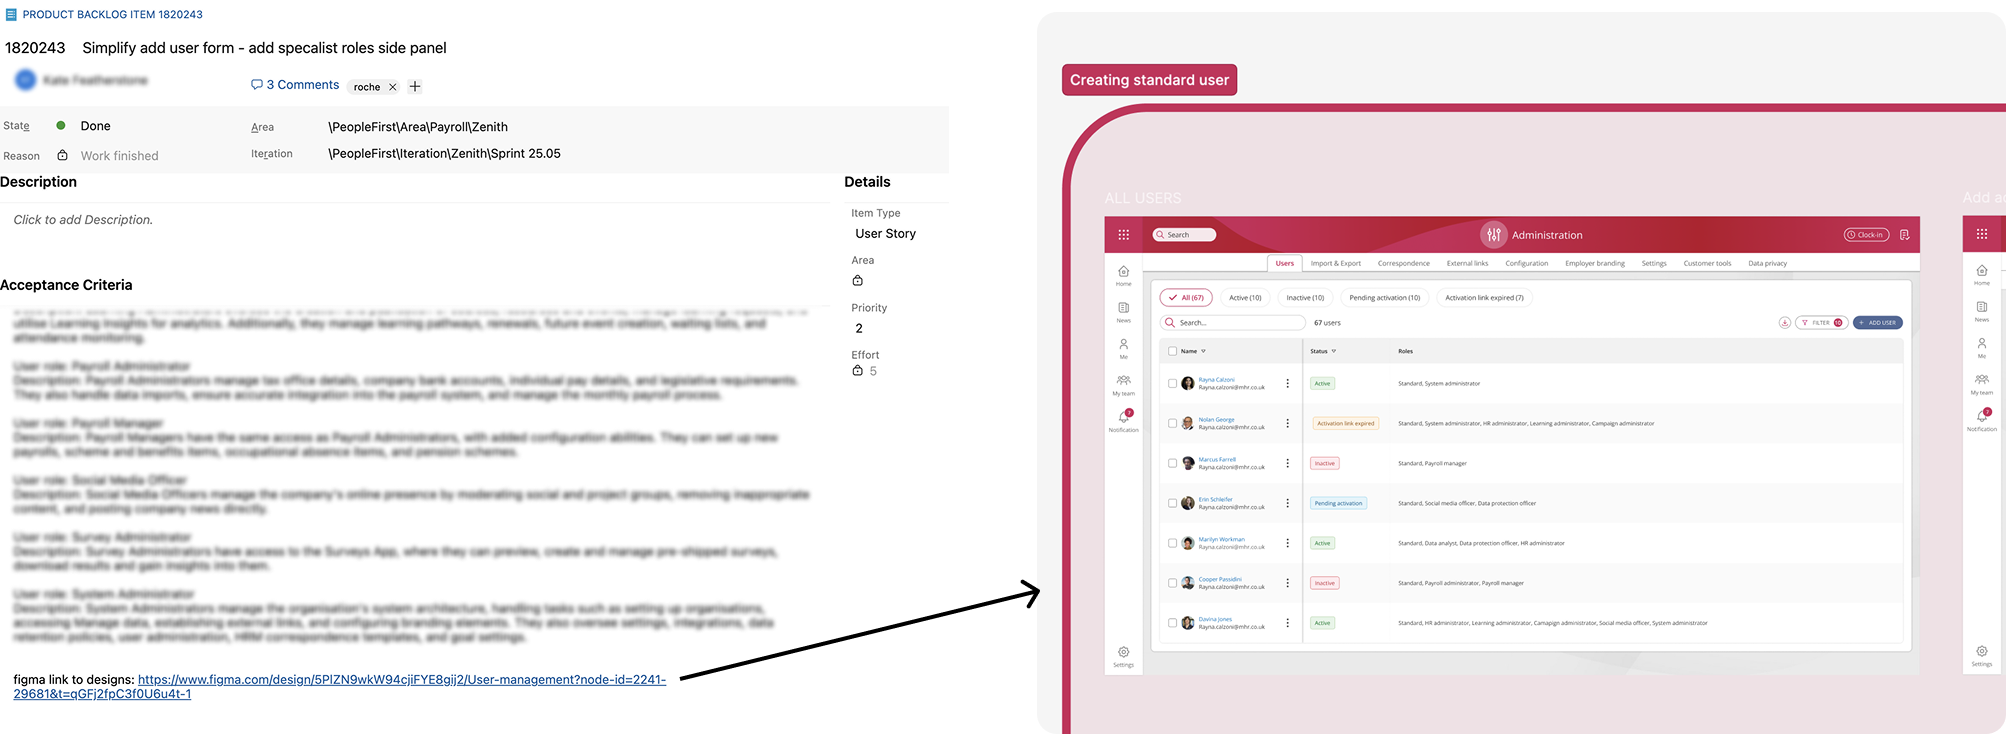
Finding the right designs
Most design tickets will include a Figma Link in the story description. These links should take you directly to the relevant design or flow.
If the link opens a large file, check for named sections within the Figma file that match the story title or feature.
If you’re not sure where to look or if the link is taking you to designs that aren’t relevant (mistaken links pasted into stories or designs have since been moved), ask the designer to clarify.
Example
Top tip
If a PBI story doesn’t have a design link, it’s worth asking for one - it’s always best to work from the latest design than guess or risk missing key updates. Sometimes, new stories are created by breaking down a larger feature, and the original design link may not directly apply to the specific PBI. Checking in with a designer and asking for the relevant design link ensures the story stays aligned with the latest designs and avoids confusion.
Exploring labeled sections in Figma
Organised layouts: Designers use labeled sections to group related designs, making navigation easier.
Sometimes, design links will take you to a specific section of the Figma file rather than a single frame. This helps provide better context when multiple screens are involved, making it easier to understand the full flow or different scenarios behind a design.
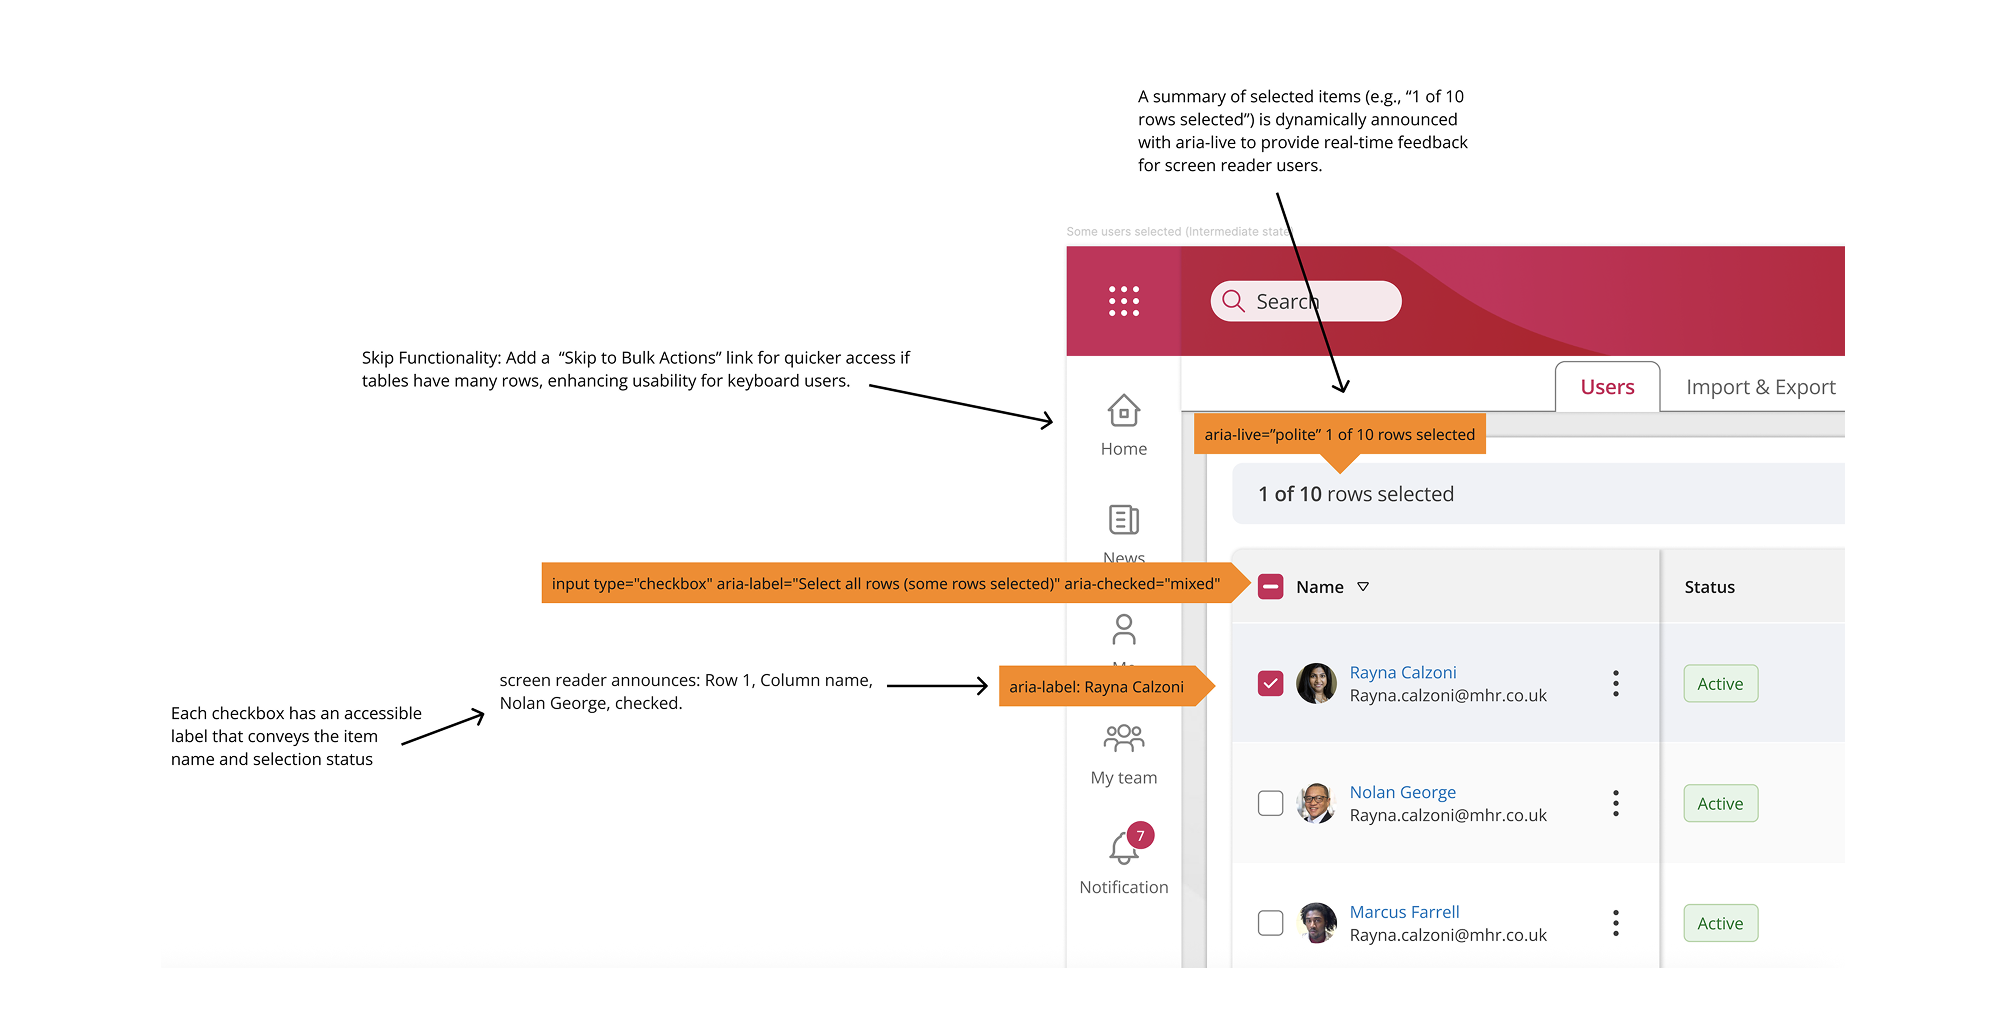
Accessibility specifications
If the design you're working on doesn’t include an accessibility spec, ask the designer. Accessibility should be considered from the start so raising it early helps avoid issues being found later in testing or post-release. Building with accessibility in mind from the beginning leads to a smoother, more inclusive experience for everyone.
Top tip
When in doubt, always ask for the spec! Don’t assume that designs are accessible unless you’ve seen a spec or discussed it with the designer. It's always better to double check.
If you have any questions about the spec or a suggestion to improve accessibility, don’t hesitate to speak up! Collaboration leads to better, more inclusive outcomes.
Example
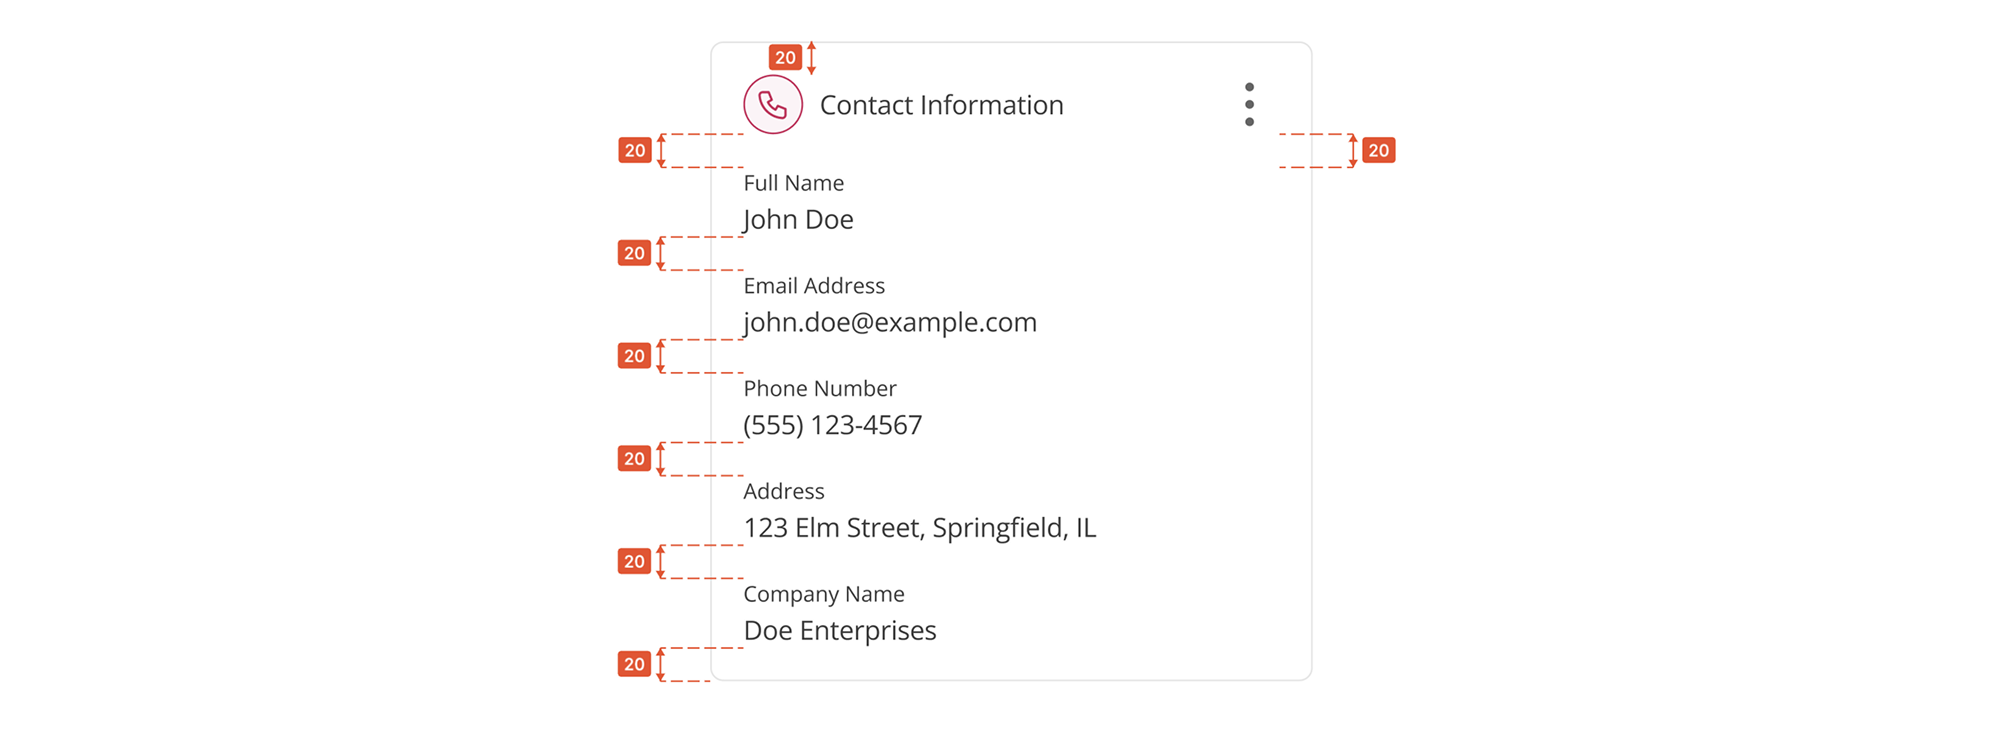
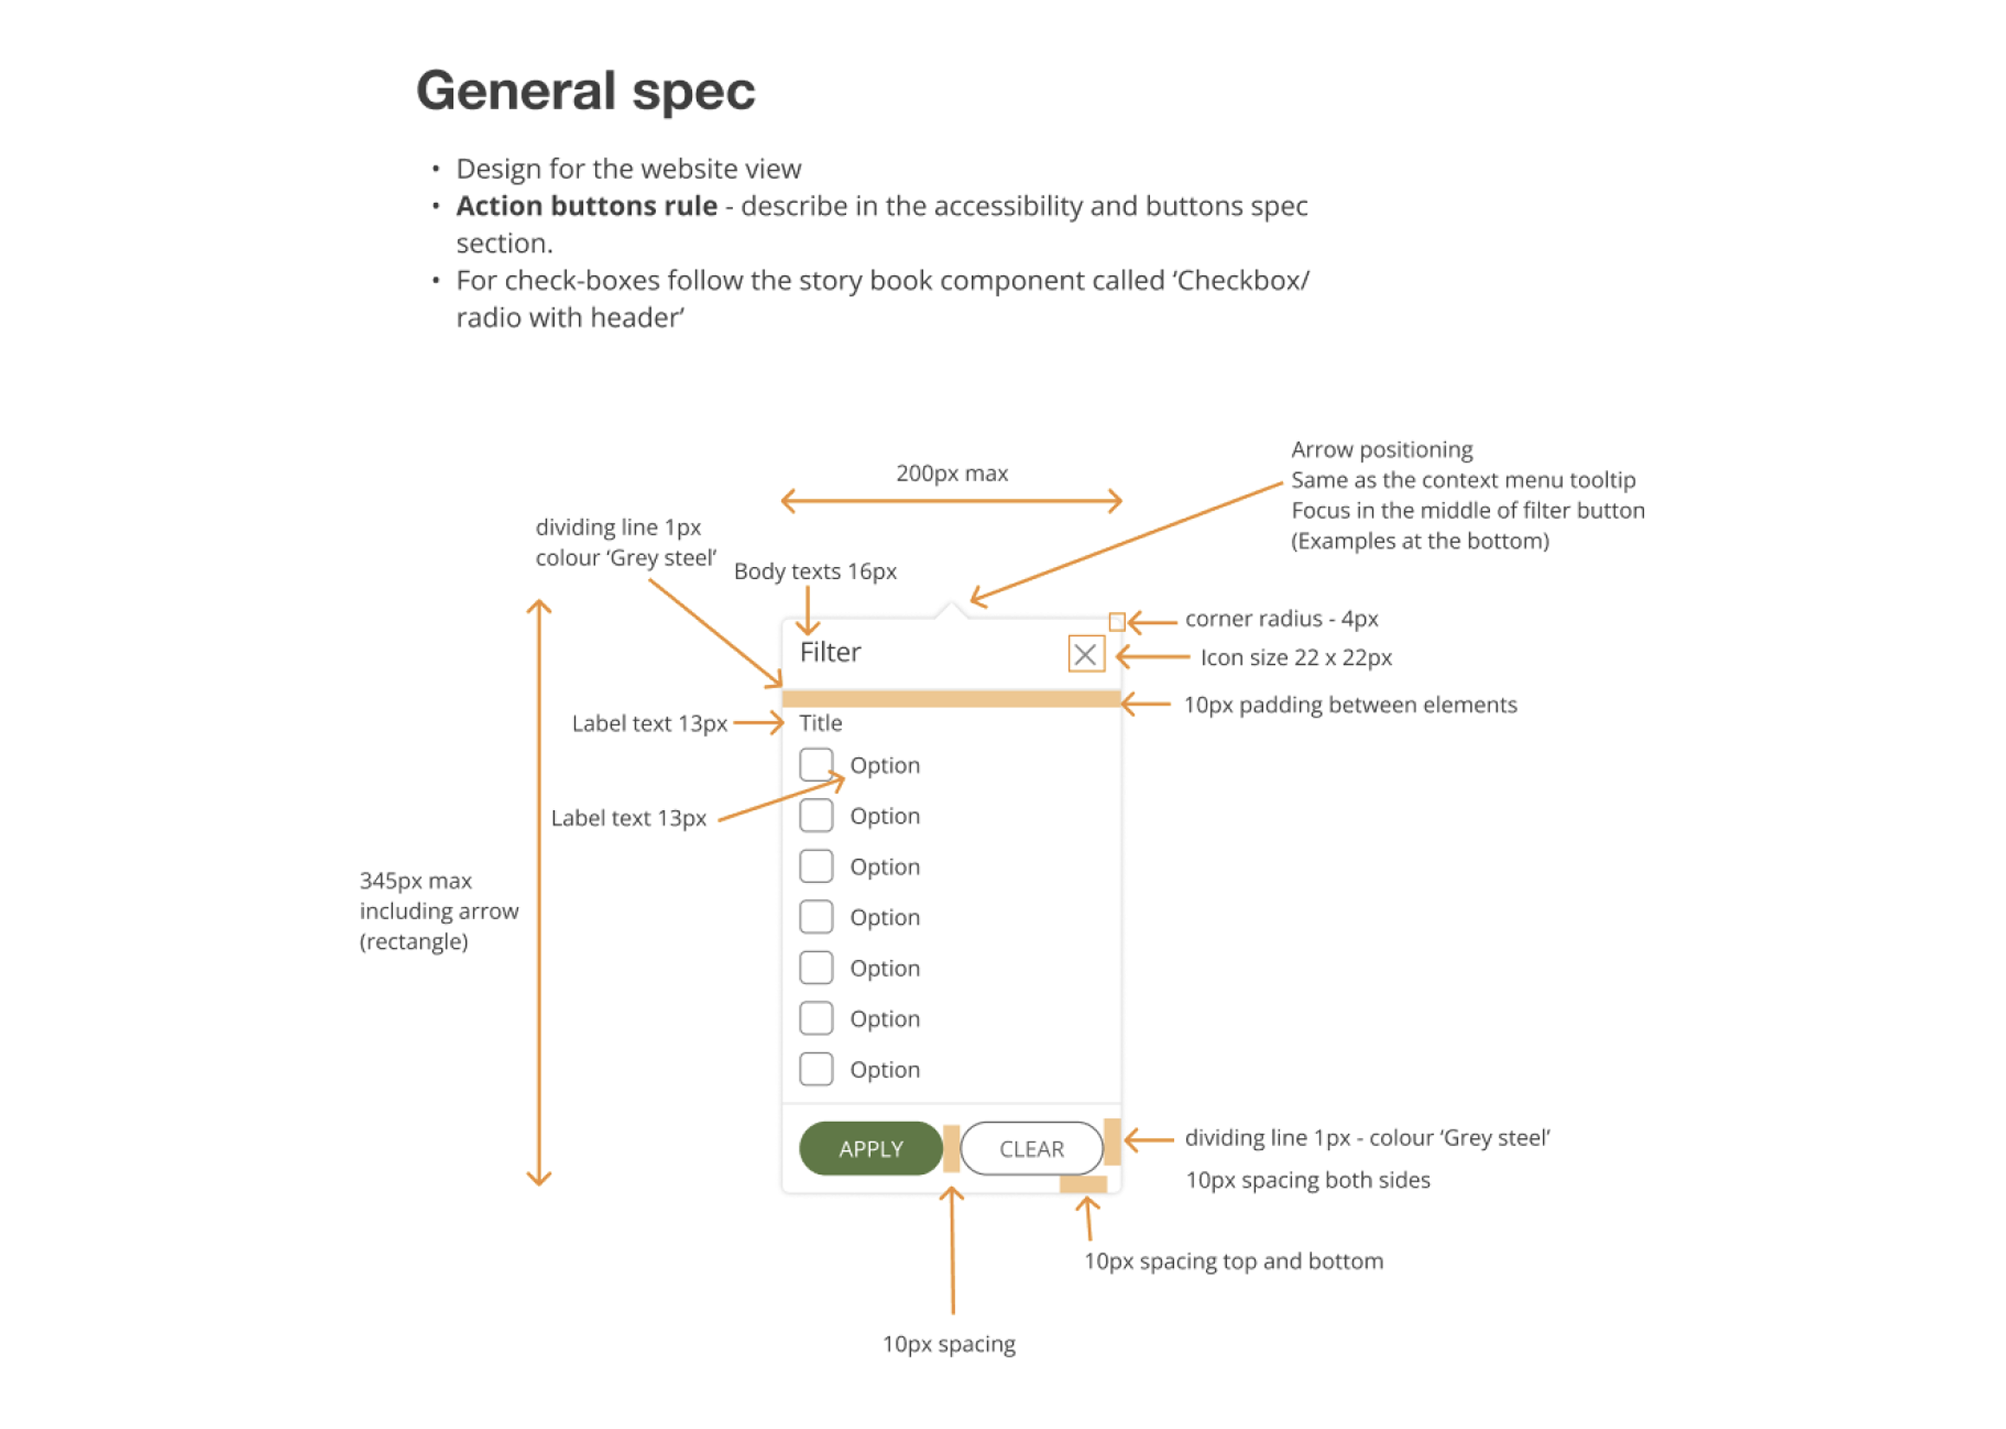
Design specifications
UX will be utilising a figma tool named Measurement. This helps make spacing requirements really clear for you, so you’re not left guessing when it comes to implementing layouts accurately.
Example
Design specifications
UX will ensure clear section labels and key info are included in the spec making it easy for others to understand, access, and build from.
Existing components won’t be re-specced, as they’re intended to be reused to maintain consistency across the product.
Example
Top tip
As we know, designs aren’t always pixel-perfect, things can slip through. If something looks off or inconsistent, don’t hesitate to ask. Clarifying early helps keep everything aligned and consistent.
Summary
This guide has walked you through the key fundamentals of navigating Figma files, understanding design specs, and collaborating effectively across teams. Remember, consistency and clear communication are key.
Please don’t hesitate to ask questions when in doubt to your UX designer, we’re all here to help!
Any questions?
If there are any questions or something you’re unsure about please feel free to reach out to Isabelle Osborn, I’m always happy to help!
Thanks for taking the time to go through this guide. I hope you found it useful!